![]()
Free Unbiased Flooring Guide For Homeowners
Carpet | Vinyl Plank | Hardwood | Ceramic | Best Dealers
(Information Provided by Consumer Advocate - No Flooring Sales)
How to Install Floor Tiles
 There are
many different types of floor tiles for many different purposes including
Ceramic, Marmoleum, Rubber, Vinyl and
Carpet Tiles to name just a few.
There are
many different types of floor tiles for many different purposes including
Ceramic, Marmoleum, Rubber, Vinyl and
Carpet Tiles to name just a few.
No matter what type of flooring tiles you choose you must follow the manufacturer's installation instructions and procedures to the letter to make sure your new floor will look great and last as long as possible.
Each type of floor tile will have its own set of manufacturer’s instructions to follow to ensure proper installation. These may include such aspects as:
Accepted use or application
Testing for moisture - Excess moisture can cause the tiles to lift or crack over time. To test for moisture, place a small piece of clear plastic on the subfloor and tape it down securely with duct tape. Leave it for 24 hours and then check for any condensation or moisture buildup underneath the plastic. If there is any moisture present, it is important to address the issue before proceeding with the tile installation.
Adhesives or mortar and grout specifications
Trowel notch requirements
Set up and drying times - Consider the set up and drying times. These times can vary depending on the type of tile adhesive used and the environmental conditions of the installation area. It is important to follow the manufacturer's instructions for the adhesive and allow sufficient time for the tiles to set and dry before walking or placing heavy objects on the floor. Rushing this process can result in uneven tiles or even tile failure.
Use of Sealers
Expansion space requirements - Consider expansion space requirements. This refers to the space left between the tiles and the walls or other fixed objects to allow for any expansion or contraction that may occur due to changes in temperature or humidity. Without this space, the tiles may crack or become damaged over time. The recommended expansion space varies depending on the type of tile and the specific installation, so it's important to consult the manufacturer's instructions or a professional installer for guidance.
Proper floor preparation
Material acclimation guidelines
Maintenance and care instructions
It is essential to carefully adhere to the installation instructions provided by the manufacturer. Any deviation from these guidelines could result in damage to your flooring and may even void your warranty. So, take the time to read and understand the instructions before beginning the installation process.
Order Plenty of Extra Tiles
If you have already ordered your new tiles I hope you ordered some extra tiles too. This is very important because there is always a assumed amount of breakage with ceramic tiles, there are always some miss-cuts when installing any type of floor tile, and there will always be a need to replace some worn, stained or damaged tiles in the future.
Don’t expect to be able to order more tiles of the exact same type next week or next year, they may not be available and even if they are, there is no guarantee they will match the tiles you already have. How many tiles to order extra? I would add a minimum of 10-15% to your initial order.
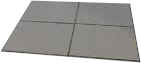
Ceramic tile considerations:
While linoleum, V.C.T. and carpet tiles are designed to be butted closely together, most ceramic tiles are designed to have a gap between each tile to leave room for a color-matching grout.
-
Smaller tiles (4” x 4”) usually have a smaller grout line of 1/16”.
-
Medium sized tiles (6” x 6” or 8” x 8”) might look best with a gap of 1/8” to ¼”,
-
Larger tiles (12” x 12”) would typically have a grout line of ¼ to ½””.
 You can choose the size of the grout line to suit your fancy but you
need to be sure include the desired grout line measurement into your room
layout calculations. Ceramic tiles range from 3/8” to 5/8” thick.
You can choose the size of the grout line to suit your fancy but you
need to be sure include the desired grout line measurement into your room
layout calculations. Ceramic tiles range from 3/8” to 5/8” thick.
Getting ready to install tile flooring
Floor preparation
Floor
Stability
When it comes to installing floor tiles, it's important to ensure that the subfloor is stable. If the subfloor is not properly supported, ceramic tiles can easily crack and the grout can crumble. This is especially true for larger tiles, which require even more stability.
While a concrete slab is the most stable option, wood floors can also work if they are properly supported from below. However, some homes may not have enough floor support to handle large ceramic tiles. To ensure stability, it's important to pay attention to the size and spacing of the floor joists.
The floor joists need to be properly spaced and sturdy enough to prevent the floor from moving up and down. The typical floor joist is 2” x 10” and spaced 16” apart on center. This is usually sturdy enough for most ceramic tile applications as long as there is a solid and sturdy underlay installed.
Before installing floor tiles, it's important to consider the spacing and height of your floor joists. If your joists don't have enough support, are spaced more than 16 inches apart or are less than 10 inches tall, you may need to make some adjustments. This could involve installing taller joists, adding another support beam, or choosing a more flexible type of flooring. By ensuring that your floor is properly supported, you can create a stable and long-lasting surface for your tiles.
Underlayment Options
Even if your joists are sturdy enough to keep your floor from bouncing up and down, you still need to have a sturdy underlay installed. The underlay needs to be thick enough to prevent the floor from bowing between the floor joists. Depending on what you already have installed over your joists, a good choice might be ¾” plywood.
You will want to buy a grade of plywood that has one side that is smooth and free of knotholes. (This is called A grade) Another good choice would be to install specialty plywood like Sturd-I-Floor® by Georgia Pacific, or use Wonderboard® or HardieBacker®.
Where to lay the first tile?
How to Install Floor Tiles Straight?
When it comes to laying tiles in a room, it's important to consider the shape and size of the space. Not all rooms are perfectly square, so measuring is key to determining which wall to use as a guide for straight tiles.
There are two approaches to consider: starting at the center of the room and accepting some crookedness along all walls, or aligning the tiles straight with one specific wall and allowing for some crookedness along the others.
Ultimately, the decision depends on the unique characteristics of the room and your personal preference for achieving a straight tile layout.
Before you start installing floor tiles, it's important to do a dry layout of the tiles to ensure a successful installation. Take the time to read the instructions carefully and see if they recommend mixing up the boxes to avoid noticeable color differences.
Many DIYers rush through the process, but preparation is key. Lay out the tiles without glue to get a sense of what they will look like once they are installed. This will help you make any necessary adjustments before you start the actual installation process.
-
Once you have the tiles laid out the way you want, use masking tape to number the tiles so you know the order that you want them installed permanently. You may also find that you want to add something extra like a border or a pattern to give your new floor a unique look.
-
Once you decide which way you want to lay the tiles down, it’s time to measure for a starting point. Lots of questions need to be answered before we can move forward.
-
Use a tape measure to mark the floor near the center of the room at both ends. Snap a chalk line making a mark all the way down center of the room.
Grout
It’s important to know the size of your tiles and the width of your grout line if you are doing ceramic tiles. When installing floor tiles, it is highly recommended to use grout spacers. These small plastic pieces help to ensure that the tiles are evenly spaced and aligned, resulting in a professional-looking finish.
Without spacers, it can be difficult to maintain consistent spacing between tiles, which can lead to uneven grout lines and an overall sloppy appearance. So, if you want to achieve a polished and precise look for your floor tile installation, be sure to invest in some grout spacers!
Learn more: